Performance testing is often neglected. I get it, it’s an additional overhead when you are trying to deliver value fast. The problem is, when we neglect performance testing upfront, it eventually becomes a massive unwieldly task to go back and start adding it in. The good news? K6 makes adding API load tests to your CI/CD pipelines as simple as it can be.
K6 from Grafana Labs is a powerful, yet simple to use performance testing tool. It is perfect for running all manner of performance tests on APIs. What I particularly like using it for is adding simple load tests to a CI/CD pipeline. These tests ensure that what ever changes you make to your API, performance isn’t degraded. Who wouldn’t want that? After all, no one likes a slow website.
Writing a load test
To demonstrate using K6 in a pipeline, I have created a repository for an example test. I also have a GitHub Action run it – more on that later. The test is going to perform a simple, and low load test against our favourite free to use profanity filter, purgomalum.com
You can view the full code for this load test on my GitHub page. I will quickly break down the details of the code for the load test file below.
Import the packages you need

This first block imports the required packages for creating our K6 script. There are also a couple of extra packages we will use for some nice reporting later on.
Set your test defaults

Options allows us to define our default options for running the tests. The number of virtual users (vus) and the duration, can be overridden by passing different values at the point of running the tests. For example
--vus 20 --duration 60s
The thresholds are the acceptable request failure rate, in our case 1%, and the allowable max duration for the 95th percentile of our total requests. In this case 200ms. I use the 95th percentile as this gives a good indicator of the poorest performance your users are experiening.
Create your constants
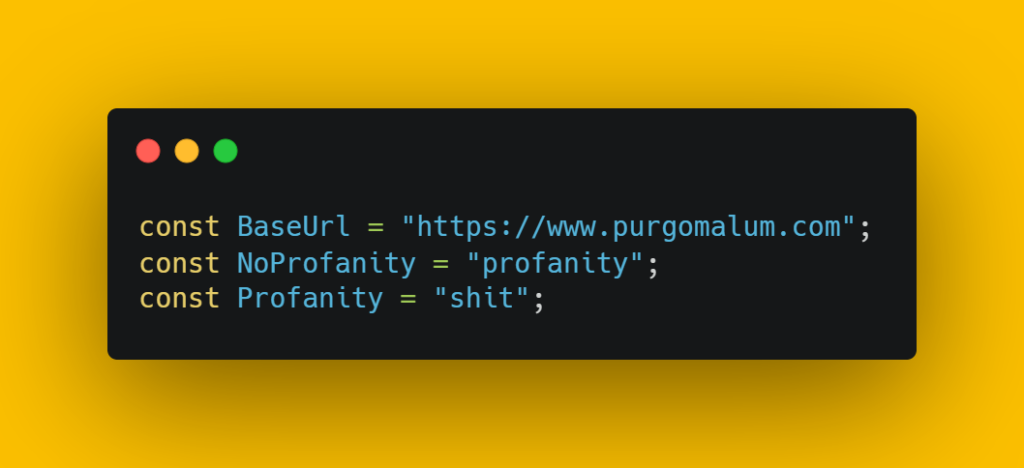
Next up we declare our constants, these being the base url for all of our requests, and the input we will use when providing a request with and without a profanity
Write your API request
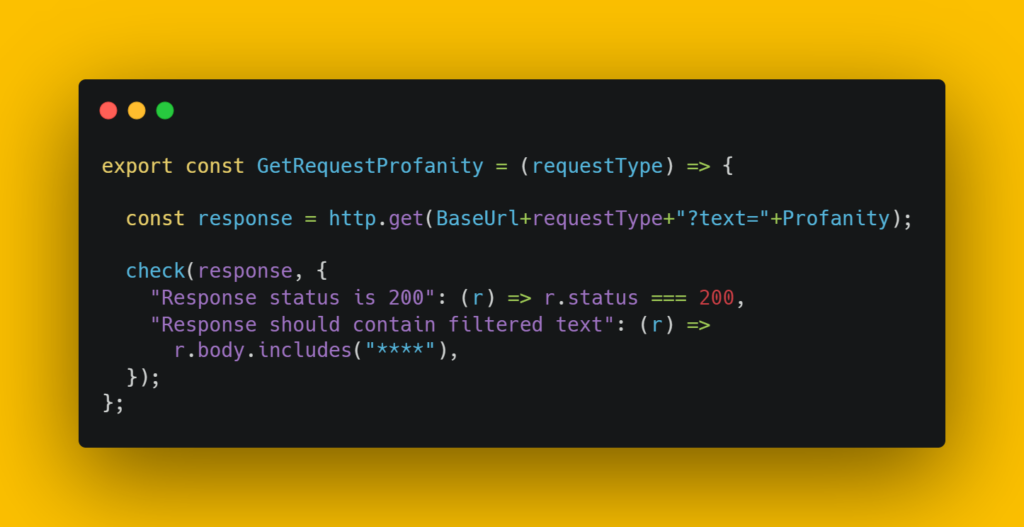
We then also need to create our API request. Here we create a reusable method that takes the request type as a parameter. This allows us to create tests that use all of the different request types our end point accepts using the same code.
Create your load scenario
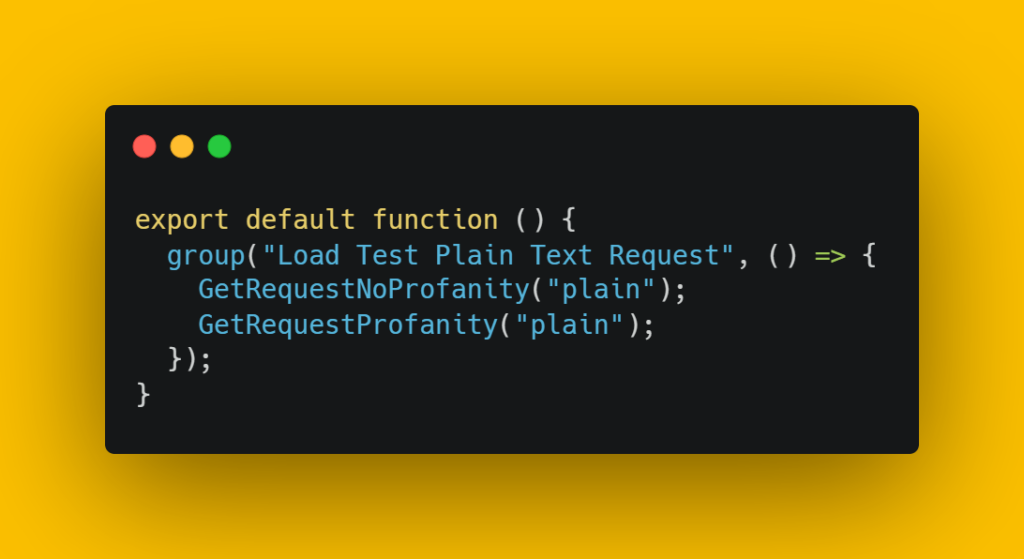
Our penultimate block of code, we now call our API request code, passing in the request type we want to use, here we are sending a plain text sample, so pass plain as the request type.
Output performance testing results to a HTML report
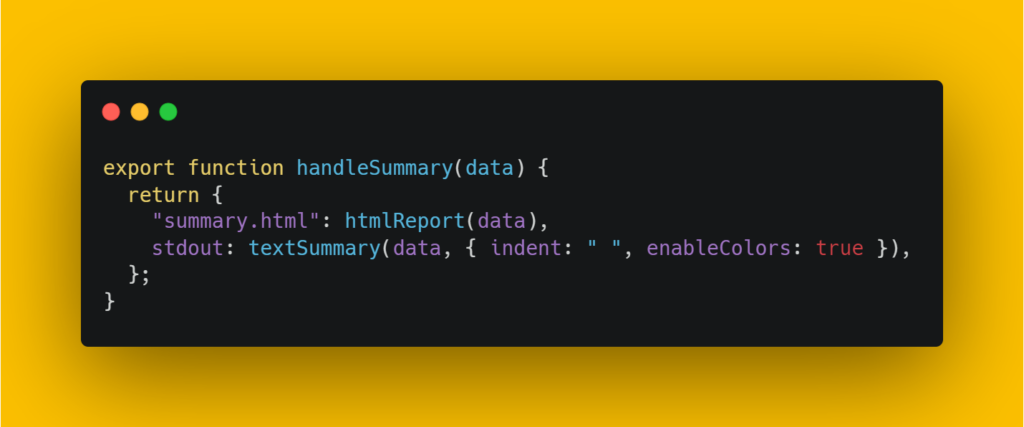
Our final block of code, this one creates a nice HTML report of the test results, that will be available to view in GitHub after each test run.
Creating the GitHub Action
Thankfully Grafana provide us with the tools required to run a GitHub action workflow for K6. This makes the setup straight forward, you just have to decide when and where you want to run it!
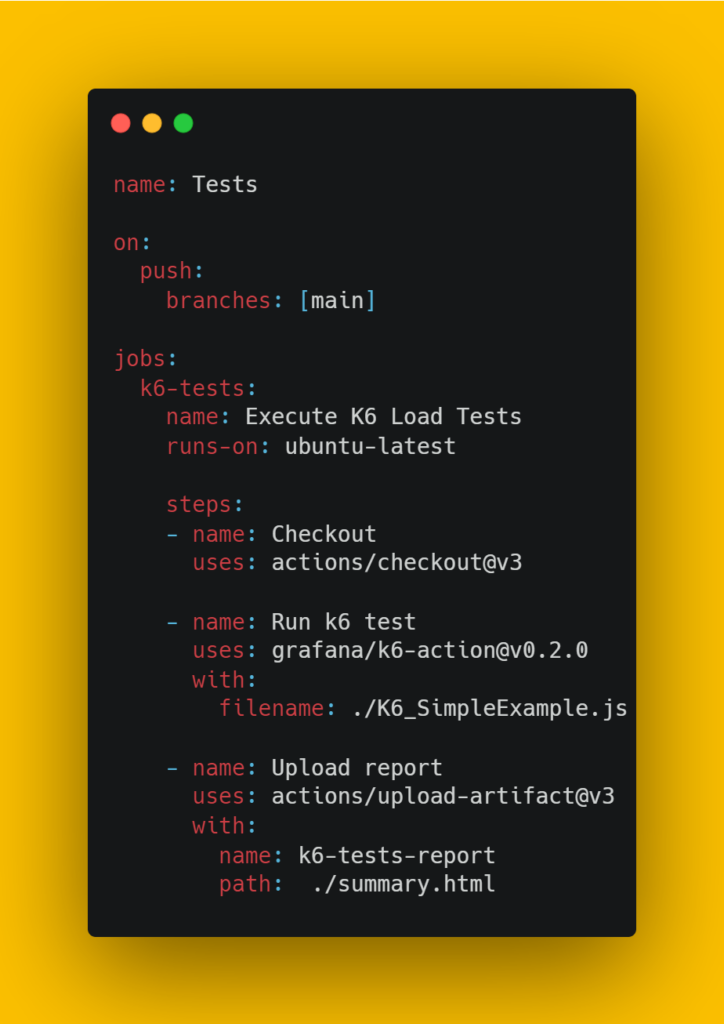
In this example, we run the load test against every push to main, you could of course run it against pull requests too. The three steps it completes are:
- Check out our test code on to the GitHub Action Runner
- Run the K6 tests using the default values we defined earlier
- Upload the HTML report so that we can view the detailed output of the test run
Add that to your .github/workflows folder and you now have performance tests in your pipeline!
The HTML Report
This is such a nice to have, and its so easy to add, you really should make sure to add it to all of your K6 tests. The report gives us a nice easy to view version of all the metrics that K6 Captures as you can see below:
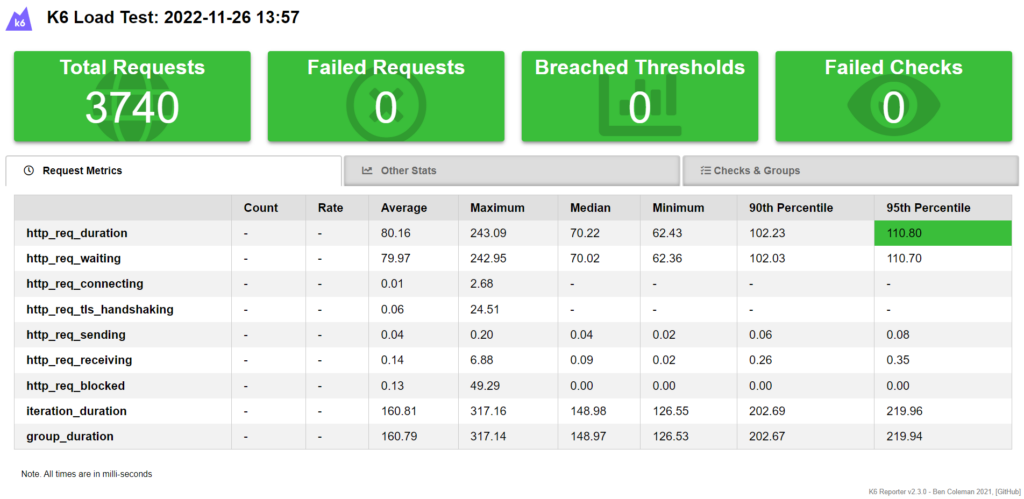
There is even more detail available on each of the tabs. Big kudos to Ben Coleman for creating this!
Summary
Hopefully by now I have you convinced that it is possible to add quick, simple, easy to build load tests to your pipelines when building APIs. Not only are they quick and simple, but get your thresholds right, and they will genuinely bring value too,
Once you have got over the initial setup, which in itself is quick, you can build new tests almost as quickly as you can think about doing it. After all, you are already using Postman or similar to test it locally, right? So you have the calls all laid out and they just need dropping into K6! EDIT TO ADD: It turns out there is even a tool to convert your postman collections to K6 scripts! Check it out on GitHub.
If you want to learn more about K6, they have a fabulous team of developer advocates contributing to their blog and YouTube channel. You might also be interested in my blog on Linting K6 – it’s easy to setup, but not as straightforward as you might first think!
Also a massive thank you to Kat K who is one of the amazing Quality Engineers in my team. Kat has been instrumental in getting this setup across our APIs.
Subscribe to The Quality Duck
Did you know you can now subscribe to The Quality Duck? Never miss a post but getting them delivered direct to your mailbox whenever I create a new post. Don’t worry, you won’t get flooded with emails, I post at most once a week.

0 Comments
1 Pingback